
You don’t need the perfect start—just a smoother one.
Farm layout is one of the easiest places for new players to overcomplicate things. You see intricate online designs with perfect sprinkler grids, animal pens in exact proportions, and every tile accounted for—and suddenly your own messy, half-cleared farm feels like it’s already behind.
This guide offers simple, practical layout ideas for Year 1 and the early midgame. The goal isn’t a showpiece farm. It’s a layout that makes daily care easier, keeps walking distances short, and leaves you room to grow without constant redesigns.
Guiding principles for a calm early layout
Before any specific ideas, a few quiet rules help:
Keep the highest-traffic areas closest to your house (crops you water daily, shipping bin, important chests).
Leave paths wide enough that you don’t get stuck or waste time weaving.
Clear and use only what you can maintain right now. Empty space is allowed.
Design for your actual tools and energy, not for the endgame sprinklers you don’t have yet.
Make it easy to expand later without tearing everything up.
A layout that feels good to walk through every day will outperform a “perfect” one that exhausts you.
A simple starter layout (Spring Year 1)
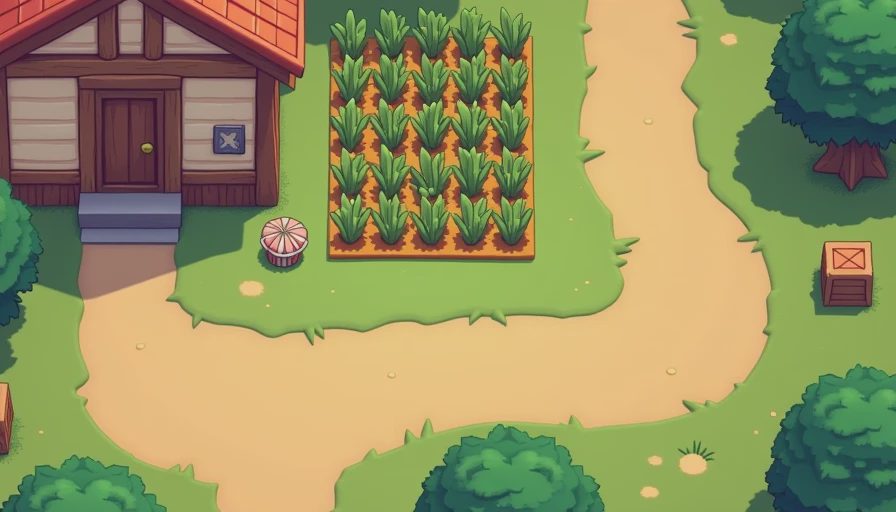
Core idea: One modest crop rectangle near the house, basic storage, and clear walking lanes.
Place a small-to-medium crop plot just south or southeast of the house—close enough that watering doesn’t become a trek.
Put a chest (or two) at the edge of the plot for seeds, extra crops, and tools.
Keep the shipping bin easily reachable on your way back inside.
Leave the rest of the farm mostly alone. Clear only what you need for the plot and a path to the exit.
This setup lets you focus on learning the rhythm of watering and harvesting without managing a sprawling field. Expand the rectangle only when your watering can and energy can handle it.
Adding early animals without chaos
When you’re ready for a coop or barn:
Place the building close enough that animal care fits into your morning loop, but not so close that it blocks crop expansion.
Put a silo nearby before you fill the building.
Keep a small fenced or open area for the animals so you’re not chasing them across the whole farm.
Add a dedicated chest for animal products right by the building.
Start with a few animals, not a full building. The care routine should still feel light.
A practical mid-spring / summer layout evolution
As you gain better tools and a little more gold:
Expand the main crop area in one direction rather than scattering multiple small fields.
Create a simple path system—straight lanes are easier to run than zigzag routes.
Group chests by purpose (seeds & crops near the field, resources near the house or mines path, gifts in a convenient spot).
Leave intentional open space for future sprinklers, machines, or a greenhouse so you don’t have to demolish finished sections later.
You still don’t need perfect symmetry. You just need the daily walk to feel logical.
Quality-of-life layout touches that make a big difference
These small decisions reduce friction every single day:
Chests at decision points – Near the field, by the door, along the path to town or the mines.
Clear entry and exit routes – So leaving the farm doesn’t require navigating obstacles.
Space for temporary items – A little open ground for furniture placement, festivals, or seasonal clutter.
Visual breathing room – A few empty tiles around buildings and plots make the farm feel calmer and easier to read at a glance.
Layouts to approach carefully in Year 1
Large, fully filled grids before you have sprinklers or the energy to maintain them.
Multiple disconnected crop areas that force long walking loops.
Decorative mazes or overly intricate paths that look nice but slow you down.
Animal setups that require crossing the entire farm several times a day.
These can all work later. Early on they often cost more energy and attention than they return.
A flexible way to grow the layout over time
Think in layers instead of a final design:
Layer 1: House + small crop plot + basic chests + clear path out.
Layer 2: Expanded crops, first animal building, better tool storage.
Layer 3: Early machines, improved paths, space marked for greenhouse or bigger production.
Later layers: Aesthetic finishing, advanced sprinkler grids, specialized areas.
Each layer should still feel comfortable to run with the tools and energy you have at that moment.
If your current farm already feels messy
That’s normal and fixable.
You can ignore whole sections until you’re ready.
You can move buildings (with some cost) when the layout starts to hold you back.
You can shrink an over-large crop area simply by not replanting the far edges.
Chests can be reorganized in a single afternoon and immediately make the farm feel better.
Nothing about your layout is permanent. The farm is allowed to evolve with you.
You don’t need the perfect start—just a smoother one.
A good early layout isn’t the one that looks most impressive online. It’s the one that lets you water, harvest, care for animals, and still have energy left to enjoy the rest of the valley. If your farm feels easier to live on this month than it did last month, you’re doing it right.
When you’re ready for the next stretch—simple sprinkler planning, organizing production areas, or keeping the farm feeling calm as it grows—we’ll walk through it together, one steady step at a time.


